
Proper sterilization and reprocessing are essential for maintaining the safety, hygiene, and performance of surgical instruments. If you use an Automatic Bone Tack Kit in guided bone regeneration or implant surgery, following the correct protocol before first use and after each procedure is critical.
In this guide, we explain how to sterilize a new Automatic Bone Tack Kit, how to perform post-use reprocessing after surgery, and the key precautions that help support safe reuse and long-term instrument performance.
Why Sterilization and Reprocessing Matter
The Automatic Bone Tack Kit is used in procedures where clean instruments and consistent performance are essential. Proper handling helps reduce the risk of contamination, supports clinical safety, and keeps the instrument ready for repeated use.
A standardized protocol can help clinics:
- improve infection control
- maintain instrument performance
- reduce residue buildup after surgery
- track sterilization cycle history
- support safer storage and reuse
For clinics that use bone tack systems frequently, a clear bone tack kit sterilization and reprocessing process is an important part of daily surgical workflow.
Initial Sterilization of a New Automatic Bone Tack Kit
Before using a new kit clinically, it should go through an initial sterilization cycle.
1. Prepare the Required Items
Before starting, prepare the following:
- sterilization pouch
- tweezer
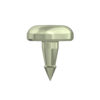
- bone tacks
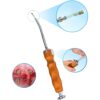
- gun
- marking pen
Make sure all items are ready and handled in a clean environment.
2. Mark the Initial Cycle Count
On the sterilization pouch, write:
- usage time: 1
- the sterilization date
This helps create a record for instrument cycle tracking from the first use.
3. Load the Bone Tacks
Use a tweezer to place the bone tacks into the box. Check that each tack is seated properly.
4. Package the Components
Place the bone tack box and the gun into sterilization pouches. Keep them lying flat so that steam can penetrate effectively during the autoclave cycle.
5. Seal the Pouches
Seal each pouch firmly and inspect the seal carefully. The pouch should have no gaps or incomplete edges.
6. Sterilize in a Pre-Vacuum Autoclave
Place the sealed pouches into a pre-vacuum autoclave.
Recommended setting:
- 132°C / 4 minutes
Follow your clinic’s validated sterilization protocol as needed.
7. Cool and Store
After sterilization, let the pouches cool completely. Store them in a clean, dry, dedicated cabinet until they are needed.
Post-Use Reprocessing of the Automatic Bone Tack Kit After Surgery
After clinical use, the instrument must go through a complete post-use reprocessing procedure before it can be used again.
1. Wipe the Instrument Immediately
Within 60 minutes after use, wipe the entire gun using an enzymatic wipe to remove visible blood and debris.
Pay close attention to:
- joints
- crevices
- trigger area
Immediate cleaning helps prevent residue from drying on the surface.
2. Remove Debris With an Air Gun
Use an air gun to blow away remaining debris from narrow areas, especially around the trigger and internal crevices.
3. Expel Residual Fluid
Activate the gun several times to expel any residual fluid inside the mechanism.
4. Perform Immersion Cleaning
Prepare a neutral detergent solution using water below 60°C. Fully immerse the gun.
Important requirements:
- use neutral detergent only
- do not use alkaline cleaners
- do not use acidic cleaners
Alkaline or acidic solutions may cause discoloration or damage the instrument finish.
5. Use Ultrasonic Cleaning
Place the gun in an ultrasonic cleaner for at least:
- 15 minutes
- 40 kHz
This step helps remove fine debris from hard-to-reach areas.
6. Rinse and Dry Thoroughly
Rinse the instrument completely with clean water. Then use an air gun to dry all areas thoroughly, including:
- handle
- trigger area
- joints
- deep crevices
Drying is a key part of proper dental instrument reprocessing.
7. Use a Drying Cabinet if Needed
If available, place the instrument in a drying cabinet to ensure complete dryness before packaging.
8. Record the Updated Cycle Count
On a new sterilization pouch, write:
- updated usage count, for example usage time: 2
- the current date
This helps maintain accurate reprocessing records over time.
9. Package the Dry Instrument
Place the dry gun flat inside the sterilization pouch. Make sure the sealing strip remains clear and accessible.
10. Seal the Pouch Securely
Press along the full sealing strip to create a firm and even seal.
11. Sterilize Again in the Autoclave
Place the pouch into a pre-vacuum autoclave and sterilize using:
- 132°C / 4 minutes
Run the cycle according to your clinic’s validated sterilization procedure.
12. Cool and Store Properly
After sterilization, let the pouch cool fully. Store it in a clean, dry, closed cabinet until the next use.
Important Notes for Automatic Bone Tack Kit Reprocessing
For safe and consistent results, keep these points in mind:
- Always use neutral detergent (1:270, below 60°C)
- Never use alkaline or acidic cleaners
- Record the cycle count each time
- Lay pouches flat during sterilization for proper steam penetration
- After ultrasonic cleaning, dry thoroughly with an air gun
- Store sterilized pouches in a clean, dry, closed cabinet
These details are small, but they are important for maintaining both cleanliness and instrument reliability.
Best Practices for Bone Tack Kit Maintenance
If your clinic uses an Automatic Bone Tack Kit regularly, it is helpful to set up a standard internal process for cleaning, sterilization, and storage.
Recommended best practices include:
- using a written reprocessing checklist
- training staff on every cleaning and sterilization step
- inspecting the gun before and after each cycle
- recording sterilization counts clearly
- separating sterile and non-sterile instruments during storage
A repeatable process helps reduce errors and improves consistency in instrument handling.
Conclusion
Knowing how to sterilize and reprocess an Automatic Bone Tack Kit before and after use is essential for safe and effective clinical use. Initial sterilization prepares a new kit for surgery, while post-use reprocessing ensures the instrument is properly cleaned, dried, sterilized, and stored for future procedures.
By following a consistent protocol, clinics can support better hygiene standards, extend instrument usability, and maintain reliable performance in surgical workflows.
If your team uses the Automatic Bone Tack Kit in implant or GBR procedures, a clear sterilization and reprocessing routine should be a standard part of your clinical protocol.