


Description
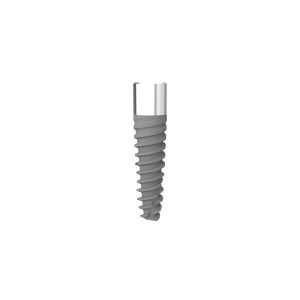
The Smart Three-Zone Threaded Implant is designed with a unique three-zone functional structure to balance anatomical safety, primary stability, and long-term crestal bone preservation.
Unlike traditional implants with a uniform cylindrical or tapered body, this implant features a differentiated apical, body, and neck design. The apical zone uses a small-diameter dense-thread cylindrical structure to improve surgical safety, while the body zone uses large threads to support primary stability and stress distribution. The neck zone combines a reduced collar, microthreads, and a smooth collar design to help reduce cortical bone pressure and support peri-implant tissue health.
Product Specifications
| Length | NP φ3.75mm | RP φ4.6mm |
|---|---|---|
| 7.5mm | — | 8000446751S |
| 9.5mm | 8000437950S | 8000446951S |
| 11.0mm | 8000437110S | 8000446111S |
| 12.5mm | 8000437120S | 8000446121S |
| 14.5mm | 8000437140S | 8000446141S |
| 16.0mm | 8000437160S | 8000446161S |
| 17.5mm | 8000437175S | 8000446176S |
3S Design Philosophy
Safe by Design
- Apical Design:
The apical zone features a small-diameter cylindrical design with dense threads, helping reduce the risk of accidental injury and preventing unintended penetration beyond the prepared depth. - Body Design:
The body section features a large-thread design to limit bone compression to the intended area. It helps achieve primary stability while effectively distributing occlusal stress. - Neck Design:
The neck area features a reduced collar combined with microthreads to reduce cortical bone pressure and help prevent bone resorption. The smooth collar also helps prevent peri-implantitis.

Simple to Use
- Simple Decision-Making:
Simplifies implant diameter selection by guiding clinicians to achieve high insertion torque through increased implant length rather than diameter, helping preserve buccal and lingual bone plate thickness as much as possible. - Simple Surgery:
Only the pilot drill is required to prepare to the full implant length. The following drills are designed with guiding tips and do not require depth-mark observation, enabling safe and precise preparation. - Simple Restoration:
Different implant diameters correspond to different restorative platforms, ensuring neck connection strength while avoiding incorrect selection of restorative components.
Set for Success
- Surface Treatment:
The hydrophilic SLA surface treatment ensures efficient and stable osseointegration. - Mechanical Strength:
High-strength Grade 4 cold-worked titanium, combined with an innovative macro-design, achieves an excellent balance between biocompatibility and mechanical strength. - Connection Platform:
High-precision machining and a platform-switching conical internal connection design help ensure connection stability.
Three-Zone Functional Design
- Apical Safety Zone
The apical zone adopts a unified small-diameter dense-thread cylindrical design. It helps reduce accidental injury risks and provides better safety when working near anatomical structures or narrow apical bone areas. - Stability Body Zone
The body zone uses a large-thread structure to help achieve primary stability. The thread design helps control bone compression and supports better occlusal stress distribution after placement. - Crestal Preservation Zone
The neck zone features a reduced collar and microthreads to reduce cortical bone pressure and help prevent marginal bone resorption. The smooth collar supports soft tissue sealing and helps maintain peri-implant tissue health.
Innovative All in 2 Osteotomy Protocol
The All in 2 osteotomy preparation concept is designed to reduce surgical complexity while improving safety and efficiency.
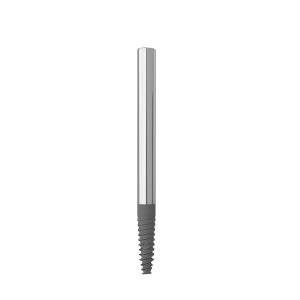
Step 1: Full-Length Pilot Drilling
Only the pilot drill performs full-depth cutting. This helps improve preparation safety, especially near anatomical structures.
Step 2: Guided Coronal Preparation
The coronal preparation is completed with an expansion drill featuring a smooth guiding post. This helps improve preparation precision and reduces the need for constant depth-mark observation.
Clinical Advantages
- Fewer drill changes
- Improved preparation efficiency
- Simplified workflow for full-arch implant cases
- Improved safety because only the pilot drill performs full-depth cutting
- Reduced learning curve for guided preparation
- More precise coronal preparation with the guiding post design
The uploaded clinical materials also highlight that this preparation method can significantly improve preparation safety and efficiency, especially because only the pilot drill requires depth-mark observation.
Drilling Protocol for 3.75 mm Diameter


Clinical Diameter Selection Guide
The Smart Three-Zone Threaded Implant system simplifies implant diameter selection to help clinicians preserve bone while achieving stable placement.

Recommended Diameter Selection
| Clinical Site | Recommended Diameter |
|---|---|
| Maxillary lateral incisors / Mandibular incisors | 2.8mm implant |
| Maxillary central incisors / Canines / Premolars | 3.75mm implant |
| Maxillary molars / Mandibular molars | 4.6mm implant |
This diameter selection concept is designed to reduce unnecessary widening of the osteotomy and help maintain buccal and lingual bone plate thickness.


Reviews
There are no reviews yet